Portfolio Company

Amortization Schedule

The Amortization Schedule panel allows you to see the original schedule that was uploaded at first without any changes in the loan payment schedule. It displays the expected loan transactions that are yet to be received. The details included are:

  • End Date: Displays the end date of the period.
  • No. of Inst Purchased: Displays the number of instruments purchased.
  • Acquisition Amount: Displays the amount of acquisition.
  • Acquisition Fees (to be paid): Displays the amount of acquisition fees to be paid.
  • No. of Inst Held: Displays the number of instruments held.
  • Principal Held: Displays the amount of principal held.
  • Cash Interest (to be recd): Displays the cash interest to be received.
  • PIK/ Accrued Interest (Calculated): Displays the calculated amount of PIK Interest.
  • PIK/ Accrued Interest (to be recd): Displays the receivable amount of PIK Interest.
  • No. Of Inst Sold: Displays the number of instruments sold.
  • Principal Repayment (to be recd): Displays the receivable amount of principal repayment.
  • Redemption (to be recd): Displays the amount of receivable amount of redemption, in case any securities are redeemed.
  • Upside (to be recd): Displays the upside amount, if any.
  • Fee Income (to be recd): Displays the receivable amount of fees.  

Recalculate

1. Click on Recalculate button to see the allocation of Actual Cashflows to original Expected cashflows.

2. After the cashflows are marked in the Amortization Schedule panel or Actual Cashflows are recorded in the Investment tab, you can click on the Recalculate button of the Amortization Schedule panel here to see the allocation of Actual Cashflows to the Original Expected Cashflows (including AS entries) in FIFO manner.


Generate AS

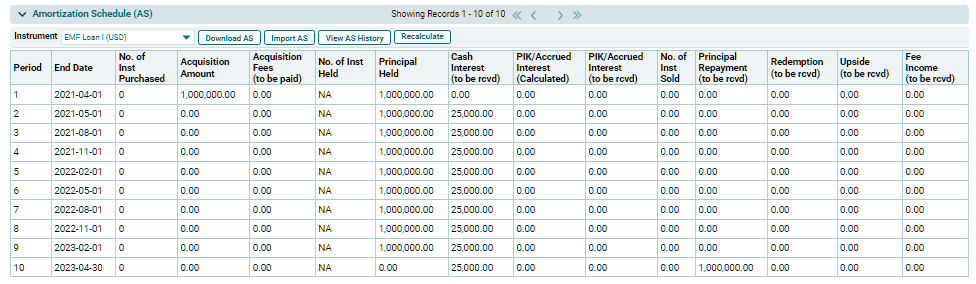
    To generate AS, follow the below steps:

    1. Click on the Select Instrument dropdown list, and select a Loan instrument.


        2. Click on Generate AS button on top of the panel


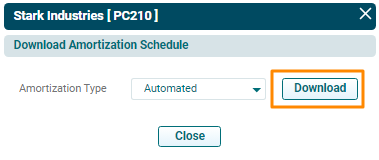
            3. A new window is displayed. Choose an option from the dropdown list- Automated or Manual. Click Download.

              4. The excel file will download. This excel file contains a format of Amortization Schedule, where you can create am expected payment schedule for the underlying loan.

                5. To validate the AS, change the AS Validated? field to Yes.
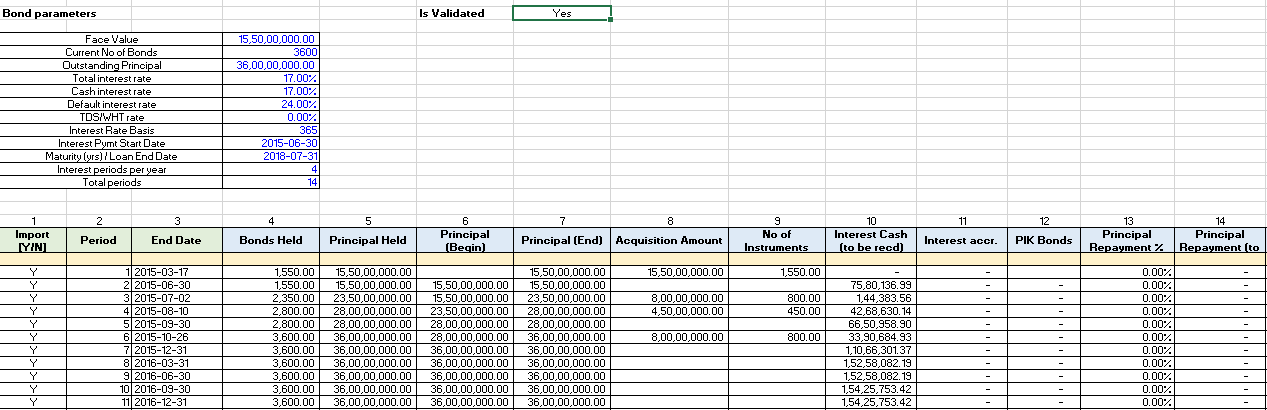
                6. Save the file.

                Import AS

                To upload an Amortization Schedule, follow the below steps:

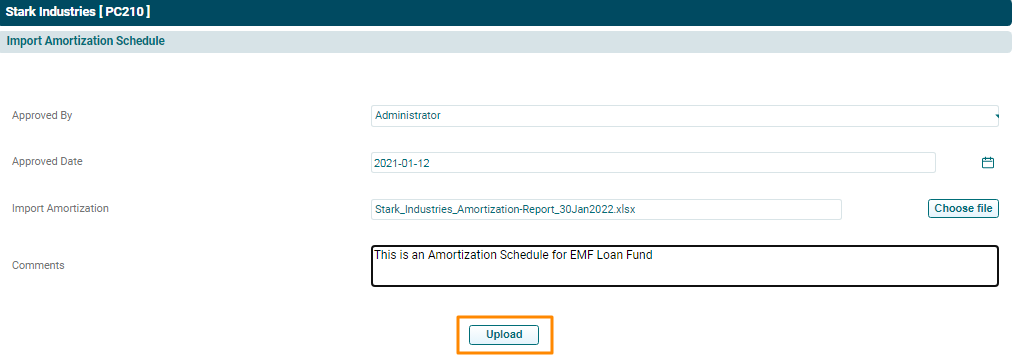
                1. Click on Import AS button on top of the panel.2. The Import Amortization Schedule window is displayed. Specify the name of approving authority and the date on which the approval was provided.

                3. Click Choose File button. Choose the excel file containing the AS.


                4. Specify Notes, if any.

                5. Click Upload.


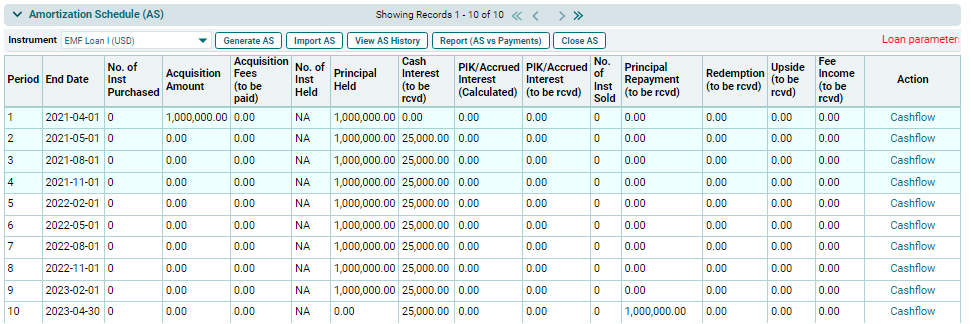
                6. The Amortization Schedule shall be populated based on the file uploaded.
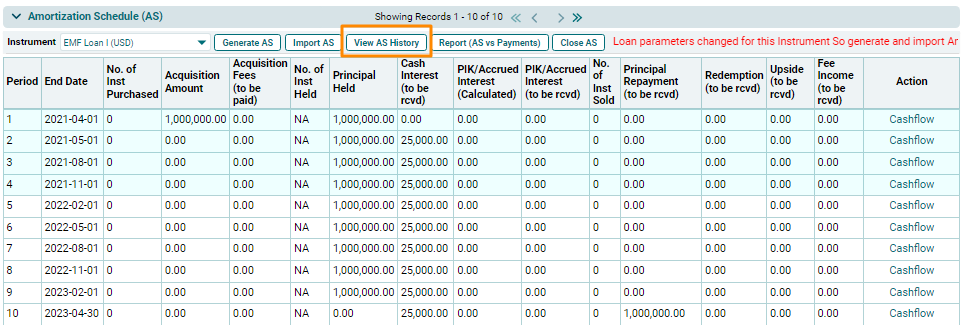
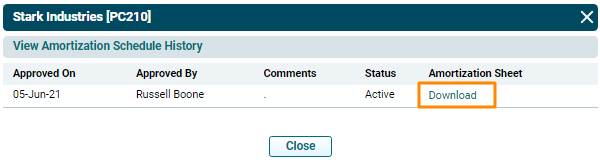


                View AS History

                This button allows you to see the AS history and the changes made. To view AS history, follow the below steps:

                  1. Select an instrument from the dropdown list.


                      2. Click on View AS History button on the horizontal bar on top of the panel.

                        3. View Amortization Schedule History window is displayed. You will see the approval details of the last AS and if it is Active. Click Download. The excel file will download.