Portfolio Company
Capture Payments
After
uploading the Amortization Schedule, you can capture payments against each AS entry. To record a payment, follow the below steps:
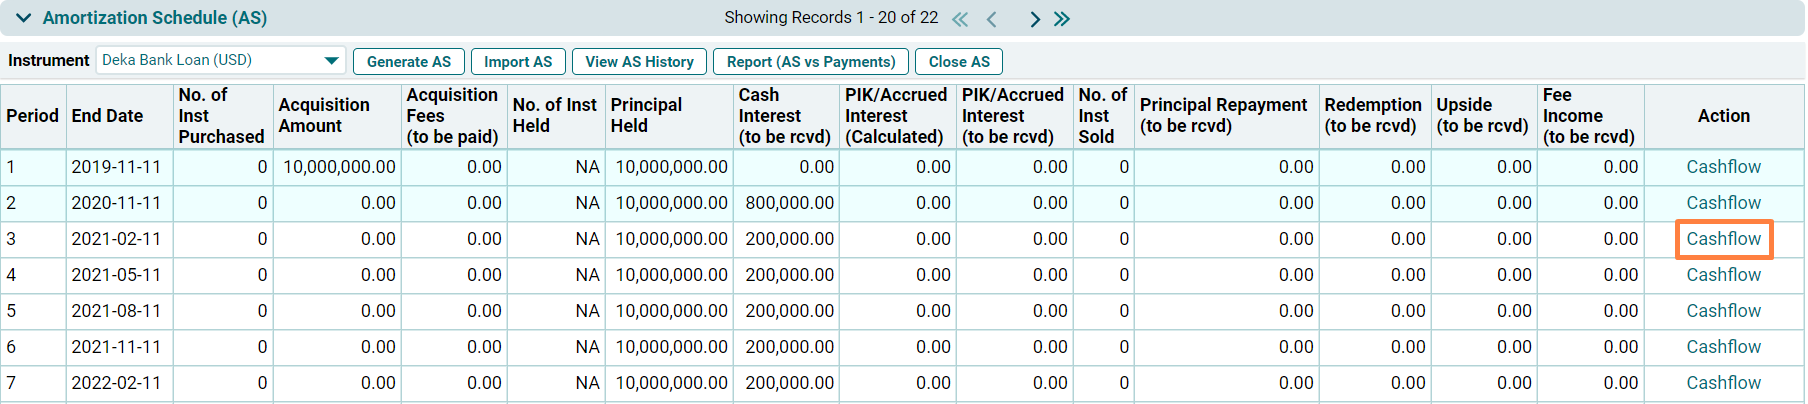
1. Click on
the Cashflow link in the Action
column.
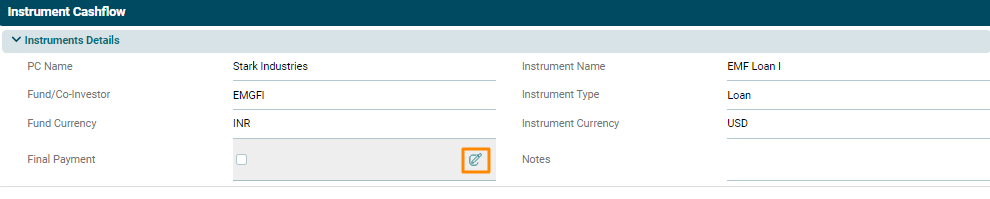
2. The
Instrument cashflow window is displayed. The Instrument Details panel displays
the basic information of the loan instrument.

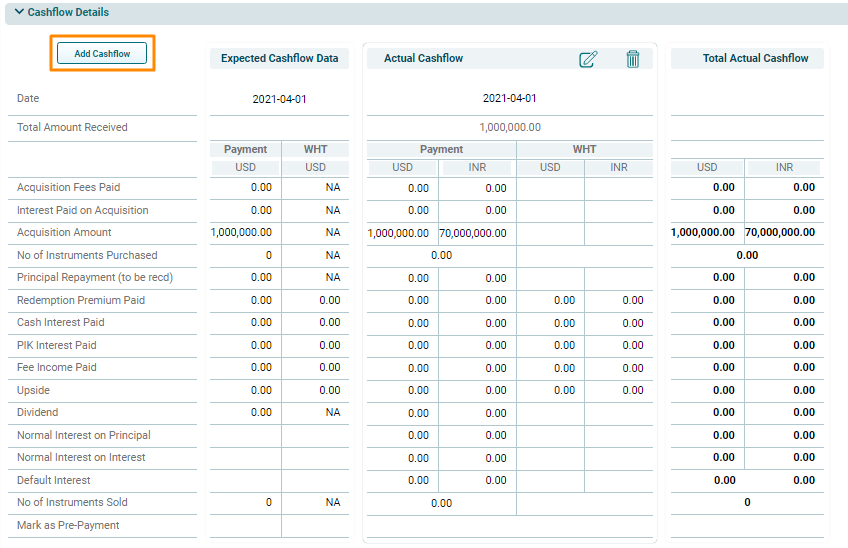
3. To add a
cashflow, click on the Add Cashflow
button in the top left corner of the Cashflow Details panel. The Actual Cashflow panel is
activated.
4. To mark a payment as final, click on the edit icon against the Final Payment checkbox in the Instrument Details panel.
5. Mark the payment as final by clicking the checkbox. Click the check icon to save the changes.

6. Once the actual cashflow has been completed for an AS Entry, then in the Amortization Schedule Panel, AS entry is visible in blue background.

There are
three payment-related scenarios-
- Pre-payment
- Partial payment
- Delayed payment
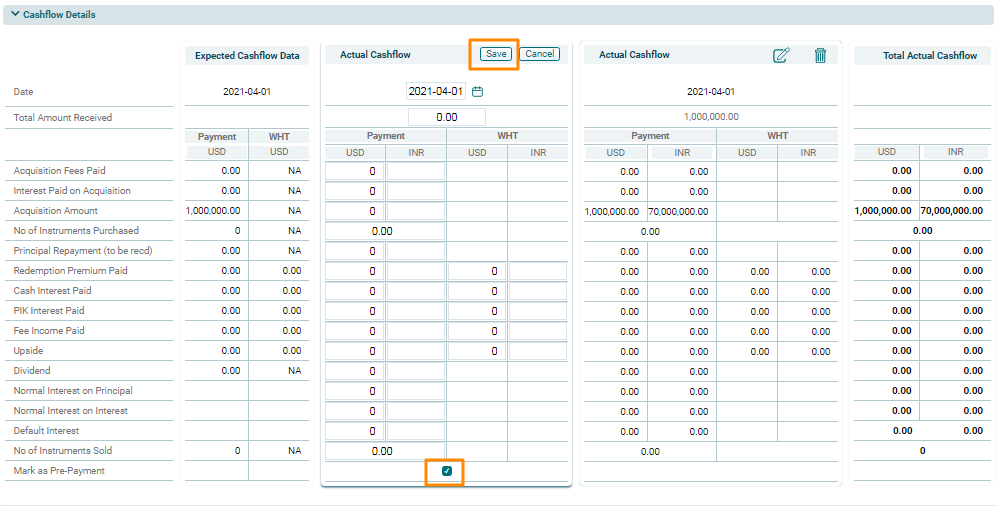
Pre-payment
A
pre-payment is one when the payment is received towards an expected cashflow,
before the due date. You can mark it as pre-payment by clicking the checkbox
against the Mark as pre-payment
column. Click Save after recording
the payment received.
Partial
Payment
When you receive
a partial payment against an expected cashflow, the remaining balance reflects
in the fields. Also, if you are aware that a partial payment is only realizable
against an expected cashflow, you can mark it as Final by checking the box.
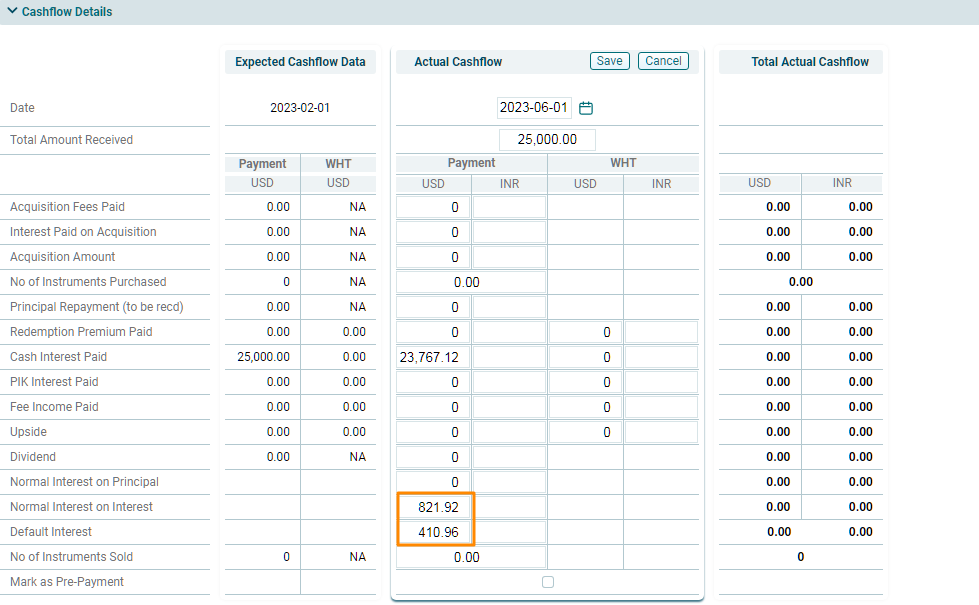
Delayed
Payment
A delayed
payment is one when the payment is received later than the scheduled date. In
the Actual Cashflow, select the date on which payment was received and validate
the amounts (auto-populated as per the AS). In case of delayed payment, select
the actual date of receipt and enter the ‘total amount received’. System will
automatically show proportioning of total actual amount into multiple heads
such as default Interest, Interest on Interest/Interest on principal and the
remaining amount gets allocated to interest/principal. Make the changes as
required manually.
Note: If required manually change the amounts in the respective blocks accordingly to accommodate scenarios such as pre-payment, delayed or partial payments.
After
updating the cashflow, transactions in the Amortization Schedule Panel will be
categorized in 3 colors:
- Blue color signifies full payment has been received and the transaction is complete.
- Yellow color signifies only partial payment has been received and the transaction is incomplete.
- White color signifies that payment is yet to be received and transaction is yet to be completed.

Editing A Cashflow
To edit a
cashflow, click on the Cashflow link in AS Panel. Instrument Cashflow window is displayed, in Cashflow Details panel click on Edit ( ) icon
on top of the Actual Cashflow. The fields are activated. Click Update after editing the cashflow.
) icon
on top of the Actual Cashflow. The fields are activated. Click Update after editing the cashflow.

Deleting A Cashflow
To delete
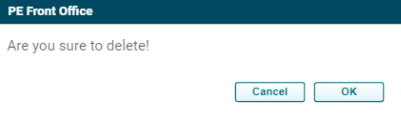
a cashflow, click on the Cashflow link in AS Panel. Instrument Cashflow window is displayed, in Cashflow Details panel click on the Delete ( ) icon
on top of the Actual Cashflow. The delete window is displayed. Click OK to delete the record.
) icon
on top of the Actual Cashflow. The delete window is displayed. Click OK to delete the record.