
Synchronize Contacts
You can synchronize your contacts from PE Front Office to Outlook. It allows you to access your PEFO contacts from Outlook.
To synchronize your contacts, follow the steps below:
1. Go to Outlook and create a new folder. Save your Outlook contacts to this folder as sync will be applicable to this folder only.
2. Extract the contacts to Excel file and clean/ remove duplicate data.
3. Copy the cleaned-up data
in PEFO templates and share it with PEFO team.
4. Once shared, you delete the contacts in Outlook Folder.
Note: For MAC users, the contact folder should be set-up using outlook web for the folders to be visible. Rest can be completed using Outlook app.
Enable Synchronization
To enable synchronization, follow the below steps:
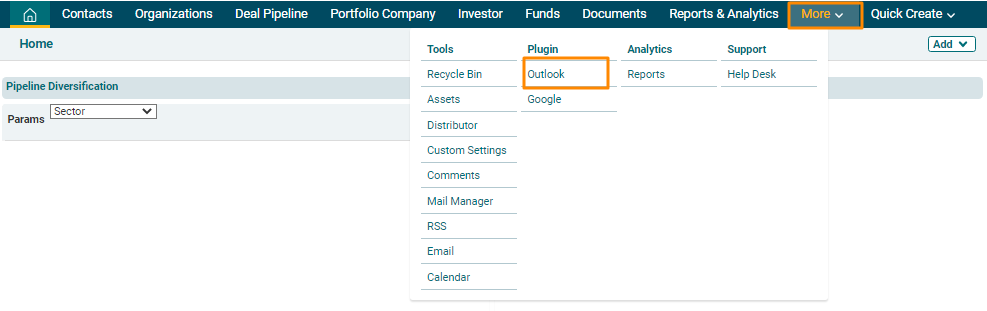
1. Navigate to More in the main menu. In Plugin, click on Outlook.
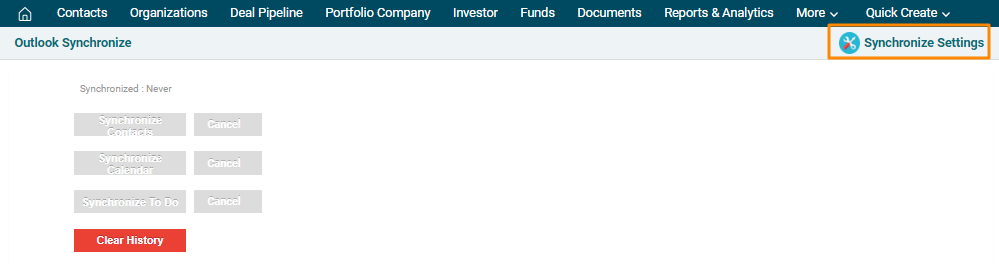
2. The Outlook Synchronize window is displayed. Click on Synchronize Settings in the top right corner of the panel.
3. Click on Sign in with Google button to choose an email account. A new window is displayed. Choose your account.

4. Enter the following details:
- Select Contacts Folder: Choose the folder you had created in the earlier step.
- Contacts Sync Direction: Choose the direction of contacts synchronization, i.e., Outlook to PE Front Office, PE Front Office to Outlook, or Both.
- Enable Contact Sync: Check the box to enable the sync.
5. It is recommended that the sync direction always remains PEFO to Outlook for Contact sync to avoid duplication of records. Click Save to enable sync settings.
Synchronize Contacts
To synchronize contacts, follow the below steps:
1. Click on Clear History button to clear
previous linkages.
2. Click on Synchronize Contacts button to sync contacts.
3. The
synced contacts will appear. You can review the contact history along with
date, time, and module.
 Note: The records are synced in a group of 100. In case more than 100 records need to be synced, run sync multiple times.