
Workflows
Workflows will streamline your business by automating operations like sending emails, creating activities, updating fields, etc. As tasks are performed automatically, you need not have to execute them manually.
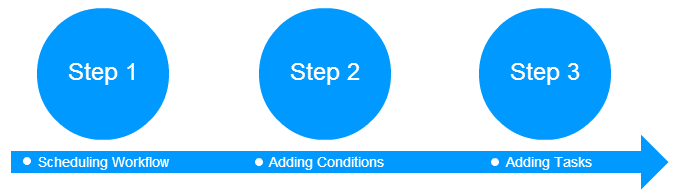
There are three steps to creating a workflow:
Step 1: Scheduling workflow
Workflows gives you
the ability to perform different operations on the selected module such as:
sending an email, updating fields, creating a whole new record in another
module, creating an event or to do, etc. This answers the question why should we select a module here?
You'll need to specify when would you like to
run the workflow. Workflow running conditions are all predefined and you only
have to choose the condition that suite your requirements.
- Only on the first save- Triggers workflow
on your first save i.e., when you create a new record.
- Until the first time the condition is true- Triggers workflow
if your condition(Step-2) will be true. Once executed, your workflow will not
trigger on the same record again. However, it will trigger actions on other
records in the selected module.
- Every time the record is saved- Triggers workflow
every time you will save your record—including first save.
- Every time the record is modified- Triggers workflow
every time you edit and save your record—excluding first save.
- System
Step 2: Adding
Condition(s)
Workflows
will be executed on the records in the selected module. More often, you might
only need to perform operations on selected records in that module. This is
where conditions will come into play. Workflow will only be executed on the
records that satisfy the condition specified by you.
For
instance, you would like to create a workflow on Deal Pipeline module. You want
the workflow to execute operations on records where 'Deal Stage' is 'Screened'.
So, your condition will be Deal Stage Is
Screened.
You'll find two different
options while defining conditions. The functionality of the conditions is
described below with an example
All Conditions : Filters records based on AND condition.
For instance,
Condition 1
AND
Condition 2
AND
Condition 3
Displays the results if and
only if ALL conditions are matched. If one condition is failed, other queries
will not be executed.
Any Conditions : Filters records based on OR condition.
For instance,
Condition 1
OR
Condition 2
OR
Condition 3
Displays the results if
at-least ONE condition is matched. If one query is failed, other queries
will be executed.
Notes:
- By default, AND condition
is enabled between ALL conditions and ANY conditions.
This will help you in grouping the two conditions, altogether.
- You can provide existing or
custom criteria while defining conditions.
- You can define multiple
conditions for a workflow by clicking on Add Condition button.
Step 3:
Adding Task(s)
The actions that should be
executed with the help of workflows can be configured through tasks, while
previously defined steps are just to provide directions and inputs.
There are following tasks
that can be defined.
- Send Mail: To send an email
notification
- Invoke Custom
Function: To update target fields of records in a module when actions are
performed on source field in a different module
- Update Fields: To updates
field(s) of selected module
- Create Entity: To create a new
entity.
To setup a workflow, follow the below steps:
1. Click on CRM
Settings icon ( ) in the top right corner of the panel.
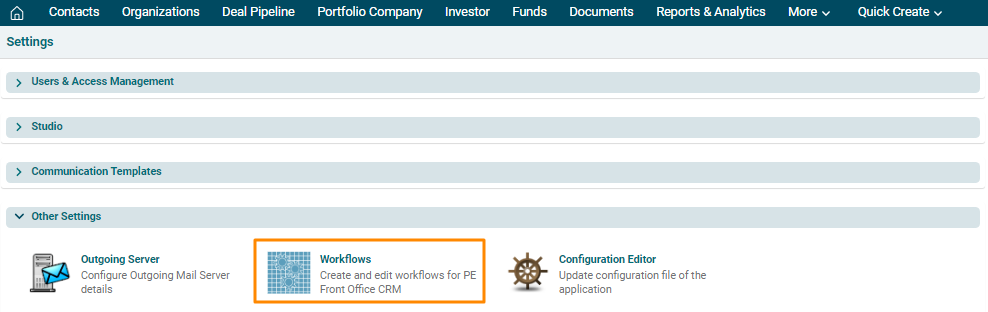
2. In the Other
Settings, click on Workflows.
3. The Workflows
window is displayed. Click on New Workflow button in the top right corner of
the panel.

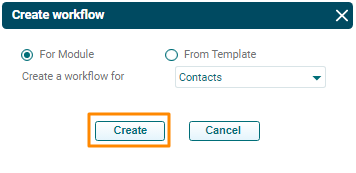
4. The Create Workflow window
is displayed. Specify whether you wish to create it for Module or from
Template. Choose a module or Template from the dropdown. Click Create.
5. The Edit Workflow window is
displayed. To schedule workflow, enter the
description. Choose an event when the workflow shall run.

6. Click on New Condition Group on the top right corner of the panel.

7. The field
will be activated. Specify a value and add a rule. Click on the value field.

8. The Set Value
window is displayed. Specify the value type, i.e., Raw Text, Field or
Expression. Specify the value. Click Save.

9. To add
another condition, click on New Condition button. Another field will be activated.
10. To
delete a condition, click on Delete icon.

11. Click on New Task button on the top right corner of the panel.

12. The Create Task window is displayed. Choose a task from the
dropdown. Click Create.

13. Click Save to save the workflow.

14. To edit a workflow, click on Edit ( ) icon. Update the details and
click Save.
) icon. Update the details and
click Save.
15. To delete a workflow, click on Delete ( ) icon. A popup drops down. Click OK to delete the workflow.