
Integration
Synchronize Calendar
PE Front Office allows you to sync your calendar between Gmail and PE Front Office.
Enable Synchronization
To enable synchronization, follow the below steps:
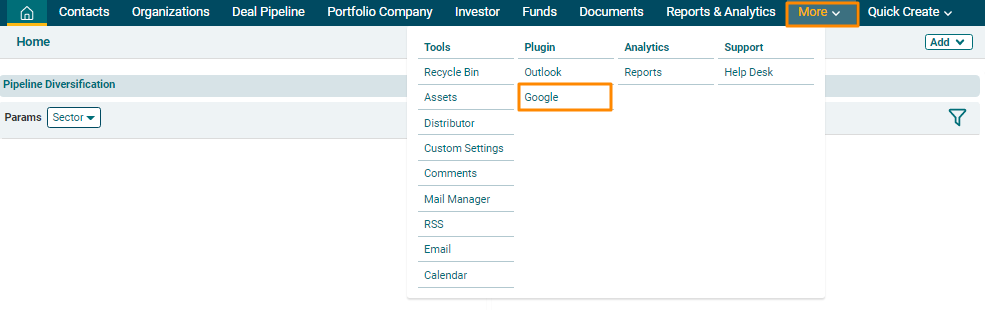
1. Navigate to More in the main menu. In Plugin, click on Google.
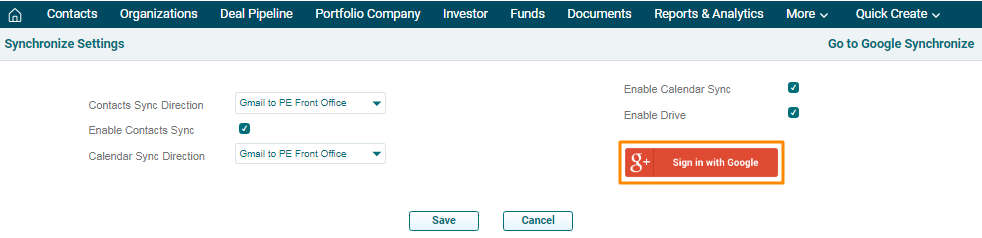
2. The Google Synchronize window is displayed. Click on Synchronize Settings in the top right corner of the panel.

3. Click on Sign in with Google button to choose an email account. A new window is displayed. Choose your account.
4. Enter the following details:
- Calendar Sync
Direction: Choose the direction of
calendar synchronization, i.e., Gmail to PE Front Office, PE Front Office
to Gmail, or Both.
- Enable Calendar
Sync: Check the box to enable
the sync.
- Enable Drive: Check
the box to enable the sync.
5. Click Save to activate sync settings.
Synchronize Calendar
To synchronize calendar, follow the below steps:
1. Click on Synchronize Now button to sync calendar.
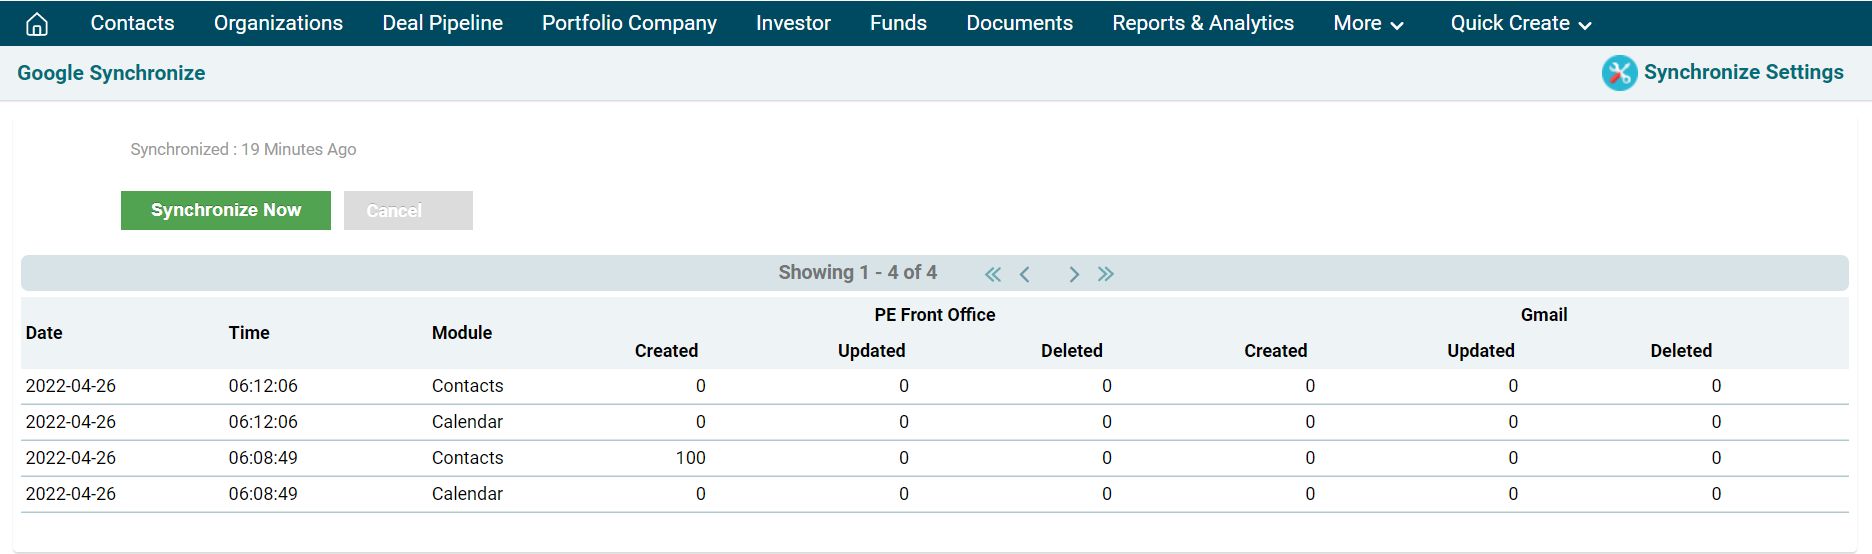
2. The status of synced calendar will appear. You can
review the sync history along with date, time, and module.

